I was fascinated to see that there is a very active aftermarket for travel cases for Starlink systems. A typical aftermarket travel case for a Starlink system is nothing more than an enormous Pelican case with suitable foam inserts. The Starlink company itself, however, has made available a purpose-built travel case for the rectangular-antenna Starlink system. The travel case is well suited to its purpose, as I will discuss.
The travel case from Starlink is constructed like a top-of-the-line carbon-fiber-shell suitcase. One benefit of the use of a carbon-fiber shell is that the resulting travel case is much lighter in weight than the thick and very heavy polypropylene body of an equivalent Pelican case.
Just like a top-of-the-line suitcase, the travel case has an extremely sturdy two-runner zipper.
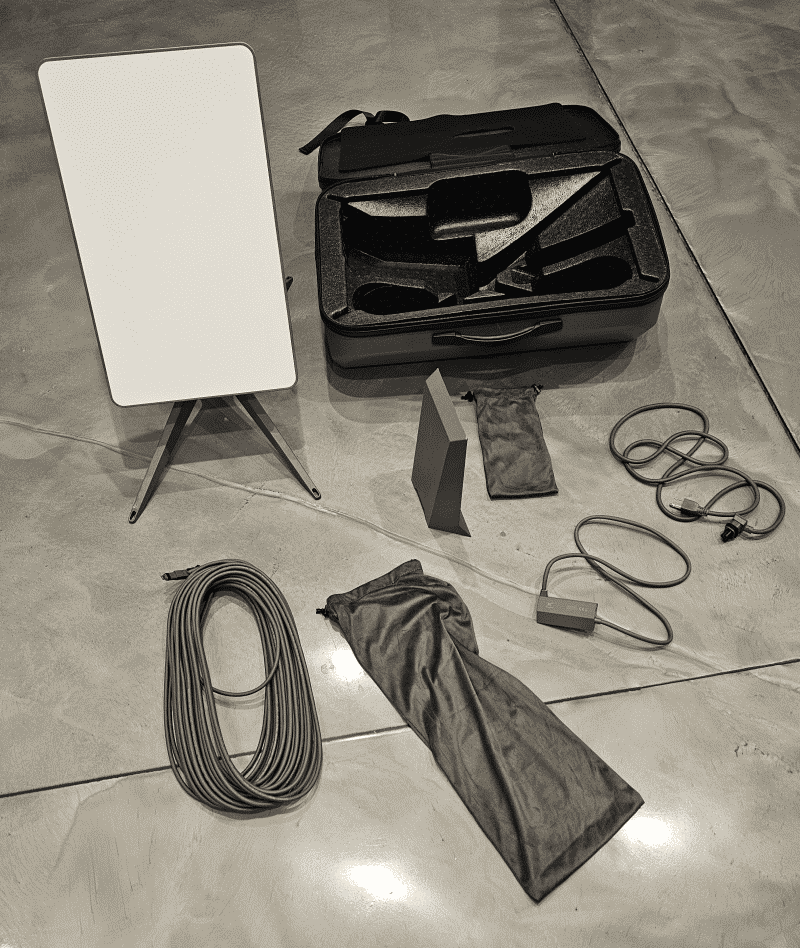
Well-shaped hard foam inserts provide stowing locations for the router, the power cord, the ethernet adapter, the antenna cable, the antenna base, and the (rectangular) antenna itself. Provided with the case are two unexplained fabric bags. My guess is that the larger fabric bag is meant for the antenna cable, and that the smaller fabric bag is meant for the power cable. (The ethernet adapter can fit into this smaller fabric bag, along with the power cable.) The reason for my guess about the intended use of the two fabric bags is that neither fabric bag is sized for the router or for the antenna base or for the antenna itself. So the only thing left is to use the larger fabric bag for the antenna cable and to use the smaller fabric bag for the power cable (and of course the ethernet adapter).
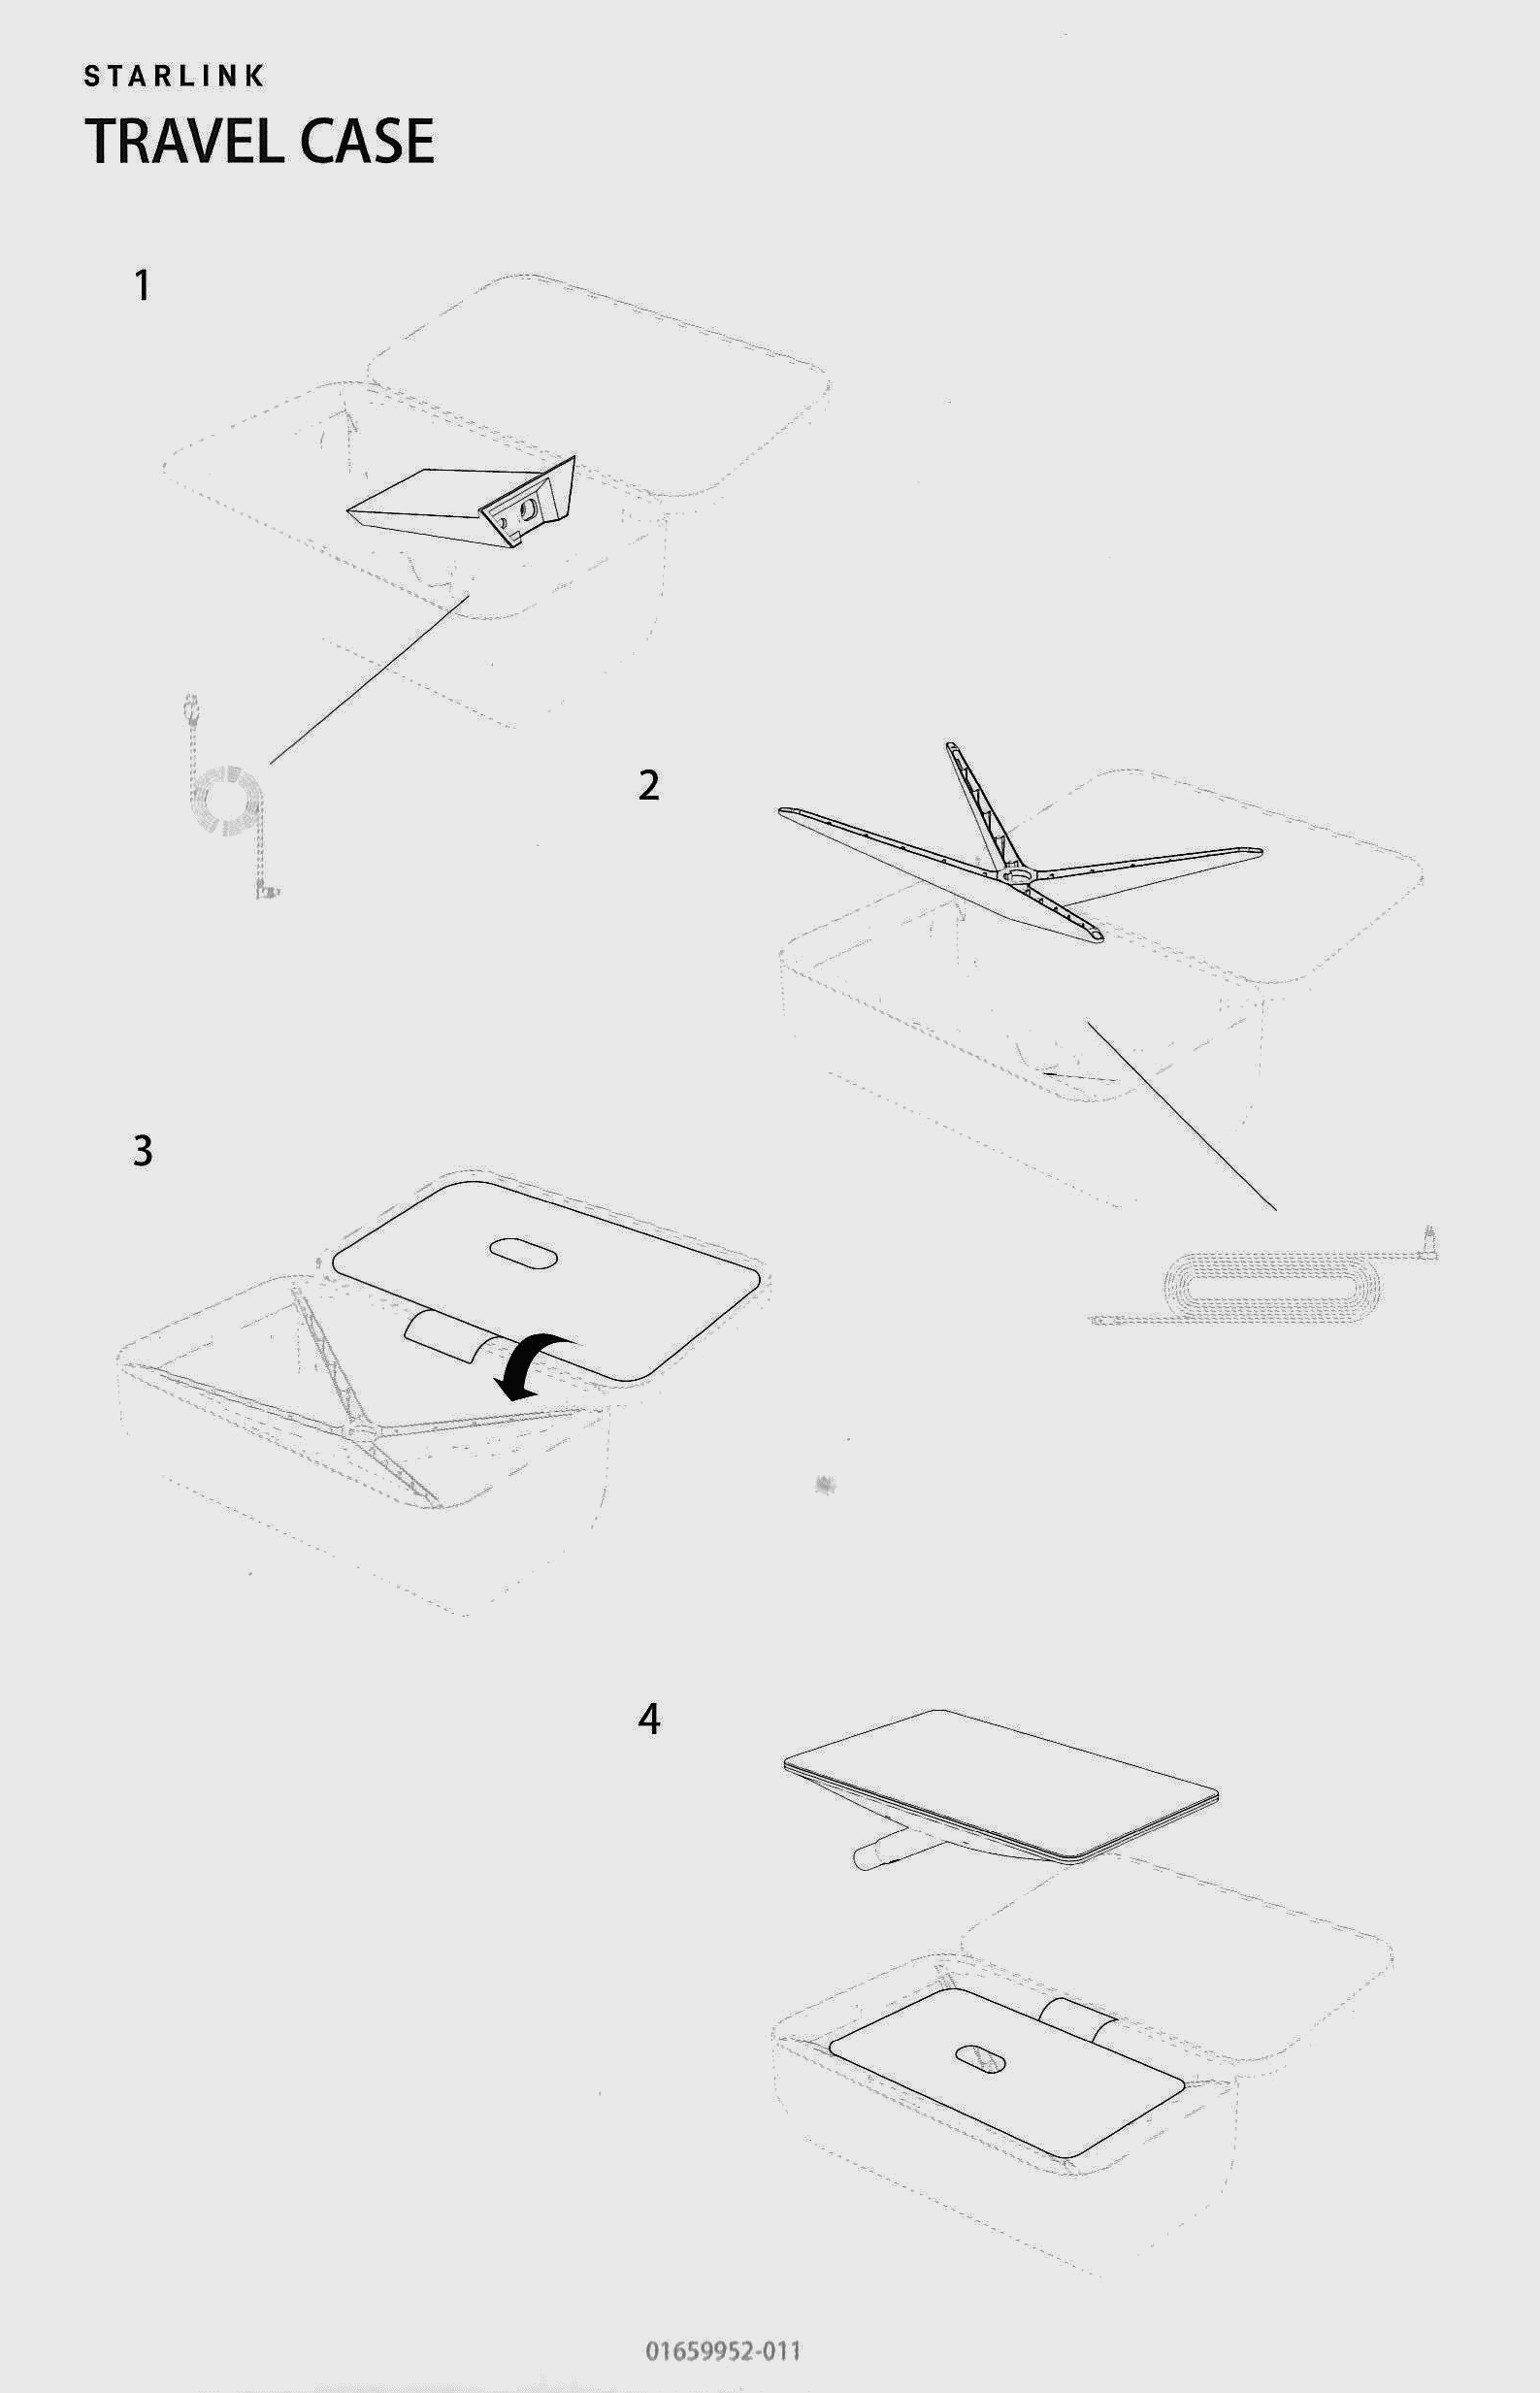
The travel case, like all other Starlink accessories, comes with a nonverbal instruction sheet. Step 1 is portrayed as placing the power cable and the router into the case. It is easy enough to work out where the router needs to go. One is, however, left to conjecture as to which of several candidate locations are intended for the power cord. (And as mentioned above, the instruction sheet is silent as to the intended use of either of the provided fabric bags.) Also unstated is where the ethernet adapter is intended to go. As mentioned above, I chose to put the ethernet adapter into the same fabric bag as the power cord, and I selected the smaller of the two fabric bags for this purpose.
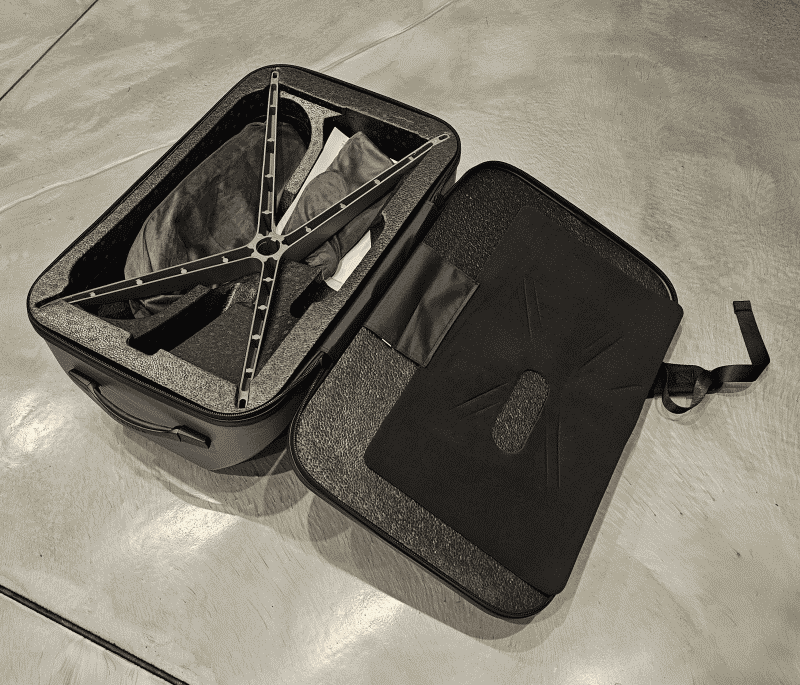
Step 2 invites the user to place the antenna base and the antenna cable into the case. (As mentioned above, the instruction sheet is silent as to the use of the larger fabric bag, but from context the only sensible use for it is to carry the antenna cable.) One works out that there is no choice but to sequence things so that the antenna cable (in its bag) is inserted first, and only after that can the antenna base be inserted. Above right is a photograph showing the result after steps 1 and 2 have been carried out. (In the photograph you can see the foam sheet of the next step.)
Step 3 says to flip into place a sturdy foam sheet. This sheet ends up located between the antenna base and the antenna itself.
Step 4 says to lower the antenna into place on the foam sheet.
Conspicuous by its absence in this instruction sheet is the crucial step of having previously placed the antenna into “stow” mode. If the user were to fail to place the antenna into “stow” mode, then an over-enthusiastic effort to push the antenna into the case would risk damaging the motor drive of the antenna.
How does one place the antenna into “stow” mode? The only documented way to do this is to fiddle around with the smart phone app until you can find the slider for “stow” mode, and then you slide the slider. If you are doing this indoors, after having taken the system out of service, you will find that you need to go through a rather tedious series of steps, including:
-
- assuming the router was previously in bypass mode, power-cycling the router three times to force a factory reset to take the router out of bypass mode;
- fiddle with your smart phone to connect to the default wifi network on the router;
- click around in your smart phone to insist that you really do want to connect to the router wifi network, despite its lack of Internet connectivity;
- quickly jump over to the Starlink app, and decline its invitation to set up a new and different wifi network name and password;
- try to get the app into “local” mode; and
- operate the “stow” mode slider.
As a general matter, by the time you get part way through the fussing with the Starlink app to try to reach the “stow” mode slider, the smart phone will have abandoned the wifi network of the router (because the router has no Internet connectivity), and the smart phone have switched over to some other wifi network. This will make it impossible to actually get the antenna into “stow” mode. In my case it took four tries of this tedious series of steps, to get the antenna into “stow” mode.
It is only later that I learned of two undocumented ways to get the antenna into “stow” mode:
-
- Way #1. Apply power to the antenna. Gently place the antenna face down. Allow about a minute to pass. The antenna will apparently figure out that it is wrong-side up, will then start counting to see if a minute passes, and will then put itself into “stow” mode. After this happens, unplug the antenna cable from the antenna.
- Way #2. Approach the antenna at a time when it does not have the antenna cable connected. Gently place the antenna face down. Now (this is the scary part) gently push the mast very very slowly toward the antenna. This will force the actuator motor to run backwards until the antenna mast is in the “stow” position.
I do not recommend Way #2 unless you are desperate, and even then only if you have the self-control to be extremely gentle and slow in your pushing the mast toward the antenna.
Maybe the writers of the (nonverbal) instruction sheet assume that if you try to carry out step 4 without having previously set the antenna into “stow” mode, then the attempt to force the (unstowed) antenna into its intended location in the travel case would work out to the same as Way #2.
After the antenna has been dropped into place on top of the flat foam sheet, it sticks up above the edge of the open travel case. When I saw this, I worried that maybe I had not stowed things well enough into their respective recesses. And the answer turns out to be “yes”. One must return to Step 2, and one must redouble one’s efforts to push the antenna base much further into the foam recesses than originally appeared to be possible. Only after this does the antenna rest in a position that is flush with the edge of the open travel case.
Unstated in the instruction sheet, but perhaps clear from context, is that the next step is to close the travel case and zip the travel case shut.
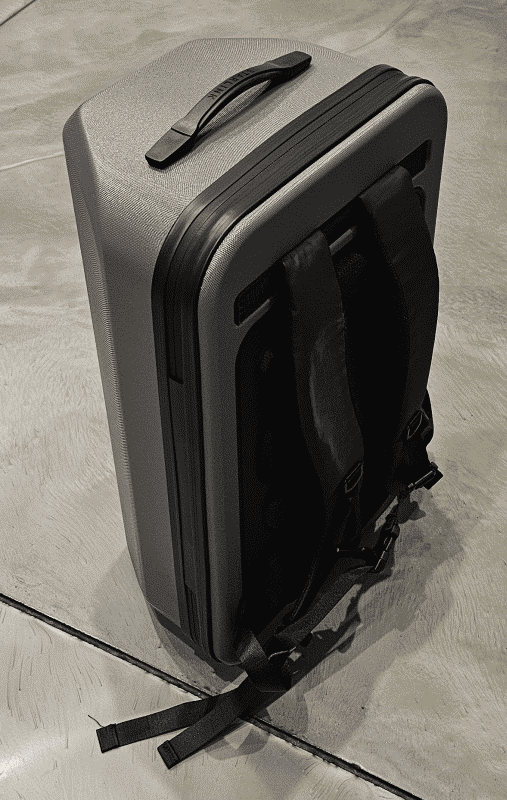
Unlike a typical Pelican case, this Starlink travel case has not one but two handles. One is on the top of the case, and the other is on the side. Backpack straps are also provided, along with a belly strap to keep the two main straps in place. Most striking is the provision of serious padding across the entire “backpack” face of the travel case, with ventilation channels formed into the padding, so that your back can “breathe” at least a little when you are using the travel case as a backpack.
The travel case, fully loaded, weighs about 21 pounds or about 10 kilograms.
One Reply to “Starlink travel case”